Transfer in Black or Colored Ink onto:
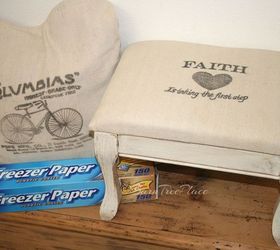
Wood Fabric Ceramics And More...
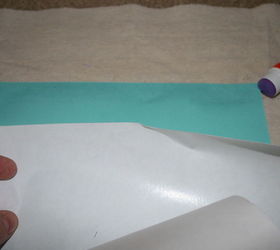
Freezer Paper
Copy Paper
Ink Jet Printer
Glue Stick
An object like a: Credit Card or Spatula
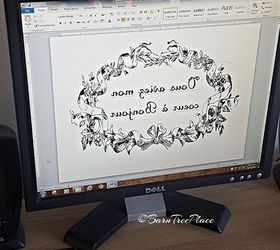
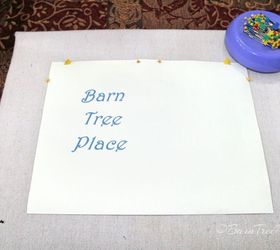
A helpful tip: I've learn the hard way! When designing your "words" with your program, make sure you create them in "Word Art". I found that "Word Art "allows you to easily to turn them into a mirror image from clicking on (on Power Point) Under Format, click Rotate, then click on 3-D Rotation, and under the Rotation section "X", change to 180°.
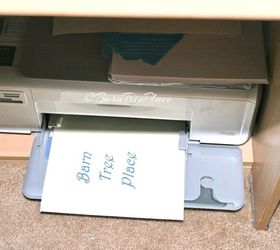
Place your (glued together) Freezer Paper/Copy Paper into your printer feed tray, in the correct position that your printer feeds. My case, I have to place shiny side of freezer paper, down.
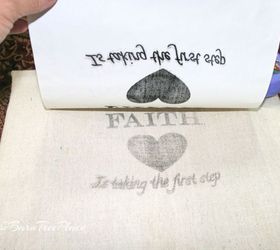
When you have your printed image and ready to transfer onto your project piece, make sure you are working on a sturdy flat surface. Place face -down onto your project.
Be careful not to move it once you place it down. The ink will smudge.
Using a credit card, spatula etc., Rub top to bottom or one side to other. Continue in in same motion.
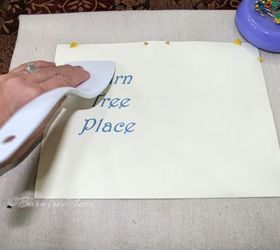
Do not pick up image until you are sure that you rubbed it really good!
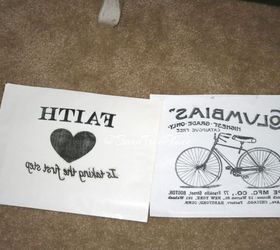
You want to transfer as much ink as possible. If this happens to you, here is a crafters' secret....Use a sharpie and carefully go over the letters or image. Just lightly touch the tip of the Sharpie to your project and trace over it. If you want it really dark, then press harder.
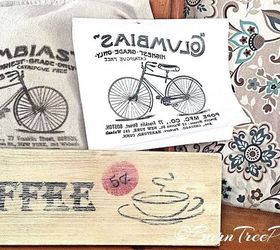
I discovered these Sharpie Paint Pens and found that they work really well too. I used them on the wood sign (picture below), to touch up some of the areas.
Original article and pictures take http://www.hometalk.com/11485240/personalize-any-project-using-freezer-paper site
Комментариев нет:
Отправить комментарий