среда, 24 мая 2017 г.

Turn Drop Cloths Into Nautical Pillows


Whoever knew that painters drop cloths could be useful for sewing projects? I bought a package at Canadian Tire to make nautical style curtains by using paint and stencils. Luckily, there was enough in the package to make throw pillows as well! For just a little more than $30.00 for fabric that's a bargain!
.


I washed the fabric first and almost no fraying occurred. It was super easy to iron, with a little steam of course. The pillows were made to be small throw pillows measuring about 12" X 12" with an overlapping closure at the back to allow for easy removal for laundering.


drop cloths become nautical pillows, crafts, reupholster


The patterns were bought online and my friend used her elaborate embroidery machine to create the finished product. The pattern includes a guide to buying all of the colors of thread needed for the project.


drop cloths become nautical pillows, crafts, reupholster, Ship s Anchor Pillow


We were both impressed with the high quality of the painters cloth and it created a perfect nautical look when they were completed.


drop cloths become nautical pillows, crafts, reupholster, Tiger Seashell Pillow


The sand dollar design was my favorite but my friend said it took a long time to complete the sand dollars because of the large number of stitches used to create it! But the machine pretty much does it on it's own with a little supervision of course!


drop cloths become nautical pillows, crafts, reupholster, Sand Dollar Pillow


They look so beautiful in my nautical guest bedroom! Who knew drop cloths could look so pretty?


drop cloths become nautical pillows, crafts, reupholster


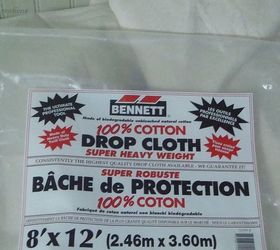
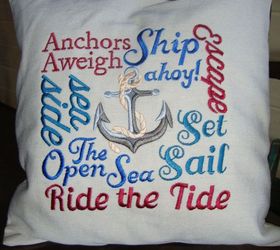
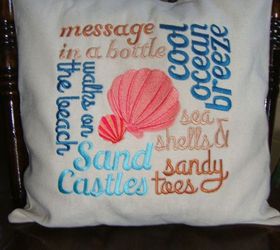
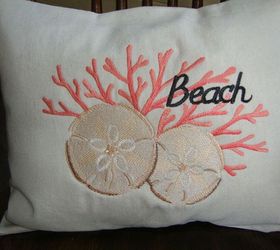
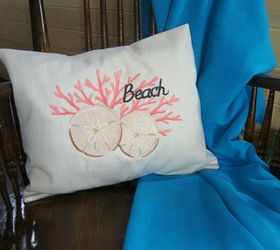
Original article and pictures take http://www.hometalk.com/11535778/drop-cloths-become-nautical-pillows site


Creative uses for a tall cabinet pantry - not for just food anymore!

All cabinetry organization items available with cabinetry purchases at designsbybsb.com


creative uses for a tall cabinet pantry not for just food anymore all cabinetry, home decor, kitchen cabinets


creative uses for a tall cabinet pantry not for just food anymore all cabinetry, home decor, kitchen cabinets


creative uses for a tall cabinet pantry not for just food anymore all cabinetry, home decor, kitchen cabinets


creative uses for a tall cabinet pantry not for just food anymore all cabinetry, home decor, kitchen cabinets


creative uses for a tall cabinet pantry not for just food anymore all cabinetry, home decor, kitchen cabinets


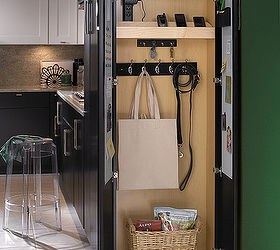
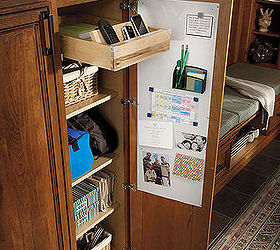
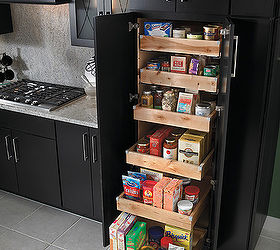
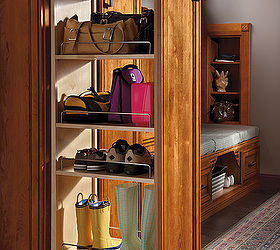
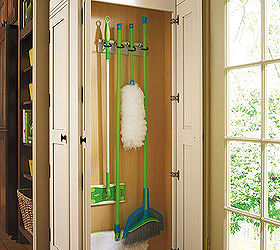
Original article and pictures take http://www.hometalk.com/115356/creative-uses-for-a-tall-cabinet-pantry-not-for-just-food-anymore-all-cabinetry site

Simple Christmas Swag


Maybe I'm cheap, but it always hurts buying Christmas wreaths every year. It's so easy to drop $40-50 just to buy two wreaths for the front and back doors, only to throw them out not long after New Year's. Starting last year I got tired of throwing that money away and decided to make my own super-simple swag for our doors.


We're lucky enough to have a lot of hemlock trees behind our house, so I took some clippers and headed out to trim back some branches that needed to be cut anyways. Our dog followed me out to "help" - and by help I mean run around with a branch I cut. If you don't have suitable trees in your yard you may be able to get away with using the trimmings off your Christmas tree or you can buy bundles of hemlock or fir tree at the grocery or craft store for pretty cheap.


simple christmas swag, christmas decorations, crafts, repurposing upcycling, wreaths


I made some smaller cuttings and started fanning them out, making a rough diamond shape.
Once it was getting close to what I wanted, I used some hand clippers to trim long pieces back into shape. If you have holly or other greenery you want to add, now would be when to do it.


simple christmas swag, christmas decorations, crafts, repurposing upcycling, wreaths


Once I was pretty happy with it, I used some craft wire to bundle it together. You want to make it pretty tight so none of your branches slide out over time as you open and close the door. Use some extra wire to make a loop at the back for hanging.


simple christmas swag, christmas decorations, crafts, repurposing upcycling, wreaths


Now add your bow. I had our bows made at the local garden center a few years ago. They had spools and spools of different fabric ribbon available, I picked the pattern I wanted and they made me up a couple of matching bows. I think they cost me $7 each, but I reuse them every year so it was definitely worth it! These bows have some wire in the back to attach it to the swag. After you add the bow, do any final trimming of the greenery.


simple christmas swag, christmas decorations, crafts, repurposing upcycling, wreaths


This finished swag cost me nothing this year since I already had all the materials, and that's just fine by me ;)


simple christmas swag, christmas decorations, crafts, repurposing upcycling, wreaths


{ Follow me on Instagram @birchlandinghome }


simple christmas swag, christmas decorations, crafts, repurposing upcycling, wreaths


Original article and pictures take http://www.hometalk.com/11529133/simple-christmas-swag site


Washi Tape Snowflakes

You can turn a handful of clothespins into pretty, colorful snowflakes in just a few minutes with washi tape. This is a great craft to do with kids because it's quick and easy and there is virtually no mess.


Simple apply washi tape to the surface (one side only) of clothespins. You can be random about it, or more structured and do a pattern.


washi tape snowflakes, christmas decorations, crafts, seasonal holiday decor, wall decor


Once clothespins are covered, you need something sturdy to adhere them to. I used old vintage cardboard milk caps but anything circular would work as long as it's sturdy.


washi tape snowflakes, christmas decorations, crafts, seasonal holiday decor, wall decor


Clip the clothespins around evenly. This might be the best part for kids, as they can easily take them apart and redo if they don't like or to get different looks!


washi tape snowflakes, christmas decorations, crafts, seasonal holiday decor, wall decor


My daughter is planning to add these to her pink Christmas tree, but they would be equally pretty hanging from fishing line from the ceiling!


washi tape snowflakes, christmas decorations, crafts, seasonal holiday decor, wall decor


Interested in more ways to use washi tape? How about 101 ways?? I'm giving away a copy of Amy Anderson's book Washi Tape Crafts, which comes with 10 rolls of washi tape! The giveaway runs through Sunday at noon. You can enter at my blog, www.diybeautify.com or by clicking on the link below.


washi tape snowflakes, christmas decorations, crafts, seasonal holiday decor, wall decor


The washi tape snowflake are pretty on their own or even stacked for more impact!


washi tape snowflakes, christmas decorations, crafts, seasonal holiday decor, wall decor


washi tape snowflakes, christmas decorations, crafts, seasonal holiday decor, wall decor


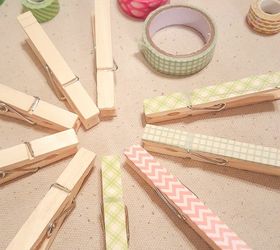
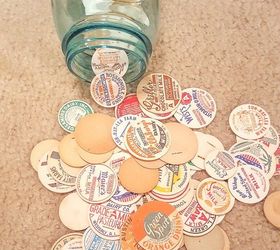
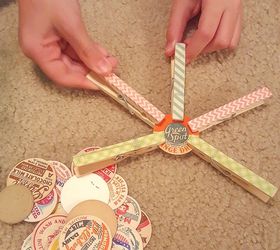
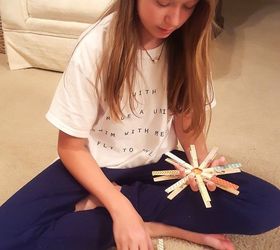
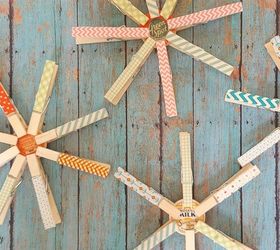
Original article and pictures take http://www.hometalk.com/11529129/washi-tape-snowflakes site

Pallet Wood Snowman/In the Woods

There are a lot of good and interesting pallet Holiday projects to view, I thought I would share another. Especially for the energetic pallet crafter. This project uses a full pallet and is painted using acrylic paint and finished with two good coats of Rustoleom clear gloss.


The background was primed with one coat of Zinsser primer then to a second coat of primer I added phthalo blue . A light mix of this color coated the entire space then using straight color I worked down from the top blending it with the still wet under coat and gradually allowing the color to lighten to give the suggestion of depth.(while blending you may need to add a little more of the base color because some drying does occur.) Using a 3" brush and mixtures of color I based in the background trees.


pallet wood snowman in the woods, painted furniture, pallet, seasonal holiday decor


The snowman was then added, based in so I would know how to place the upcoming parts. He will have 3 or 4 more coats added before he's done, partly to build his form and mainly because he'll get other colors on him as the painting developes. The foreground now can have some blues and purple color added for the under coat for the snow.


pallet wood snowman in the woods, painted furniture, pallet, seasonal holiday decor


At this point I added the middle ground trees and snow and some grasses. The tree color is a mixture of burnt sienna black and a little white. I used the chisel edge of a 3" flat brush for the trunks, and a liner brush for the limbs. A fan brush was used for the snow covered leaves.


pallet wood snowman in the woods, painted furniture, pallet, seasonal holiday decor


Now to the foreground and bringing some personality to Mr. Snowman (nope I didn't give him a name/ the friend who is picking him up soon will though.) I mixed a little blue with white for the first coat of snow and did not cover the entire base coat. once this coat is dry I added pure white. Some people suggest adding a hint of yellow to the top coat, that is up to you of course. For the scarf I first painted it a deep red/orange then a straight red over top. The lines in the scarf are yellow. The right edge of the body is light blue, I add a thin layer of white to the inside edge of the blue to help it blend in to the body.


pallet wood snowman in the woods, painted furniture, pallet, seasonal holiday decor


Lastly I added a hint of snow to his hat, a Cardinal, and a Rabbit for extra character. I did neglect to mention the highlighting. For the trees a very light blue was added to the edges of the trunks and branches, and the grasses and stump had white and very light brown. You can simplify the painting and add your own personal touches.


pallet wood snowman in the woods, painted furniture, pallet, seasonal holiday decor


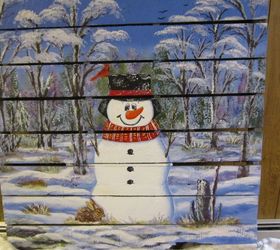
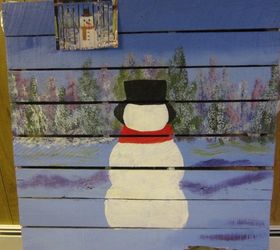
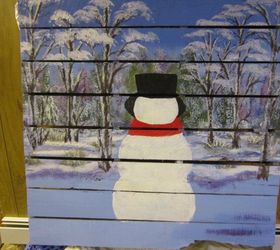
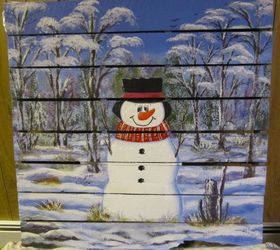
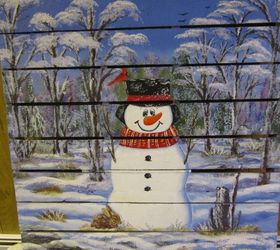
Original article and pictures take http://www.hometalk.com/11528002/pallet-wood-snowman-in-the-woods site

Upcycled Tin Can Christmas Nesting Dolls


This is a fun and simple project that can be used as a decoration or as a fun gift wrap for a small gift.
Supplies you will need
Printer and printer paper
Free Template below
Scissors
Tape
Glue
4 Cotton Balls
1 Empty 24oz can
1 Empty 15oz can
1 Empty 10oz can
1 Empty 6oz can
Safety can opener


Step 1 - Cook some tasty dinners, wash, remove labels and save your empty cans. Be sure to use the safety can opener that allows you to put the can lid back on top of the can.
Step 2 - Print out the templates available at the link below

Step 3 - Carefully cut out template pieces and assemble according to template instructions.


upcycled tin can christmas nesting dolls, christmas decorations, crafts, how to, repurposing upcycling


Step 4 - To finish Santa Hat unroll one cotton ball almost to the end. Cut off small end piece and glue to tip of hat. Gently pull on the remaining piece of cotton until it reaches around the bottom of the hat. Attach with glue. Make two folds in hat and glue to 24oz can lid.


upcycled tin can christmas nesting dolls, christmas decorations, crafts, how to, repurposing upcycling


Step 5 - To finish Mrs. Claus. Glue one cotton ball to center of 15oz can lid. Take a second cotton ball and gently pull it into a circular shape to cover the entire lid of the can. Secure it in place with glue. Glue one more cotton ball on top to make a hair bun.


upcycled tin can christmas nesting dolls, christmas decorations, crafts, how to, repurposing upcycling


Step 6 - To finish Reindeer. Glue circular cut out to top of 10 oz can lid. Attach the antlers so that they will lay down inside the can lid when the cans are nested.


upcycled tin can christmas nesting dolls, christmas decorations, crafts, how to, repurposing upcycling


Step 7 - To finish the Elf. Do not attach the elf's hat to the 6oz can lid as it fits inside the can when the dolls are nested.
, Crafts


upcycled tin can christmas nesting dolls, christmas decorations, crafts, how to, repurposing upcycling


Original article and pictures take http://www.hometalk.com/11527735/upcycled-tin-can-christmas-nesting-dolls site


DIY Upcycled Chip Bag Christmas Decorations Tutorial


Would you believe all these decorations are made from empty snack bags? They are light weight, non breakable and eco- friendly. But best of all they are easy to make. I made them for my Christmas Tree last year but the cats had a great time playing with them too.


All you need are some empty chip bags, a ruler, a marker scissors, rubber cement and some thin flexible wire.


diy upcycled chip bag christmas decorations tutorial, christmas decorations, crafts, how to, repurposing upcycling


I used small snack bags but larger ones would work too.


diy upcycled chip bag christmas decorations tutorial, christmas decorations, crafts, how to, repurposing upcycling


diy upcycled chip bag christmas decorations tutorial, christmas decorations, crafts, how to, repurposing upcycling


You can easily make your own shiny chip bag decorations, everything you need to know is in this video.
DIY Tutorial Silver chip bag chain, snowflakes and Christmas balls,
, Crafts


diy upcycled chip bag christmas decorations tutorial, christmas decorations, crafts, how to, repurposing upcycling


Original article and pictures take http://www.hometalk.com/11527312/diy-upcycled-chip-bag-christmas-decorations-tutorial site