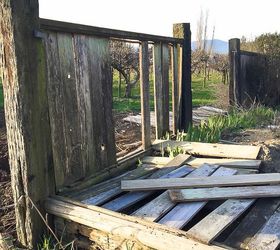
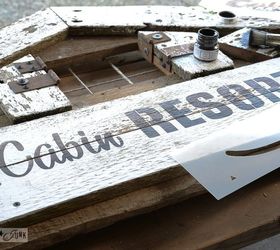
I have it bad. If a neighbour should (ahem) knock on my door, informing me his fence fell down and do I want the wood, best step out of my way... because I'm about to BOLT! True story.
So when it was time to deck the halls for Christmas, those fence boards were first on my hit list.
I wanted to make some festive, fun old looking Christmas signs. But with a twist...
Each sign would actually DO something Christmas like, or at the very least, showcase some pretty cool repurposed styled setup!
These are EASY to make, because they use stencils. Another true story!
So... how did I do? :)
Stencil sources and tutorials are avail at the bottom of this post.
Note: I'm a DIY blogger at Funky Junk Interiors (.net) and carry my own line of old sign stencils, which I LOVE to showcase in unique, easy ways! :)
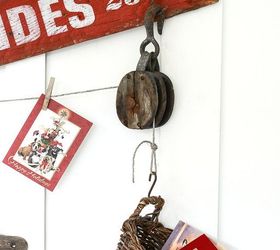
This fun little Sleigh Rides sign is holding up Christmas cards, thanks to a pulley setup and a little wicker basket. And the sleigh on the wall was the perfect finishing touch!

How to prep old wood:
- removing all the nails
- pressure wash the mildew off
- lightly sand
- paint or build as desired
And the basket is ready to roll to collect those Christmas cards. If I get any... eep.
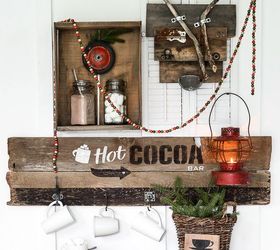
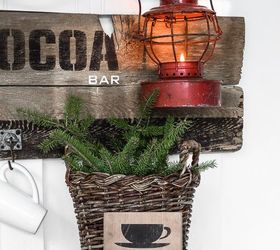
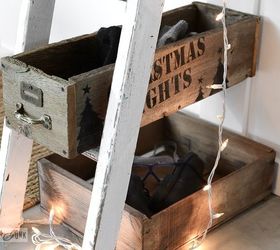
Welcome to this year's rustic Hot Cocoa Bar! Doesn't it resemble something you may find in a log cabin?
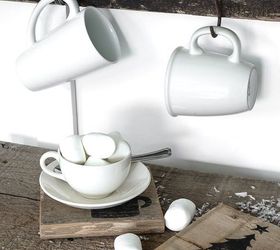
The sign became a mug holder, an old crate to hold the essentials, a reclaimed wood and branch deer head (because taxidermy is all the rage of course)... and you are ready to be served!
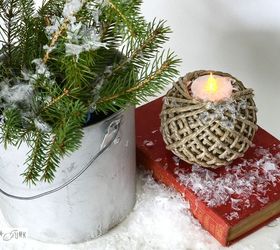
And a basket of greens say fresh if you plunk the branches in a jar of water.
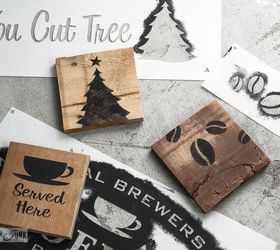
Simply cut scrap wood into squares, and stencil with bits and pieces to custom create designs to suit!
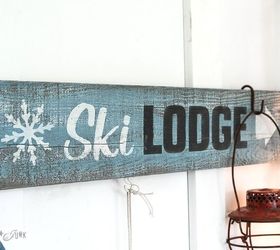
You don't have to be a skier to appreciate an icy cool Ski Lodge sign!
Add a few hooks, and you have a themed place to hang your coats. Or towels. Or maybe even stockings... hmm....
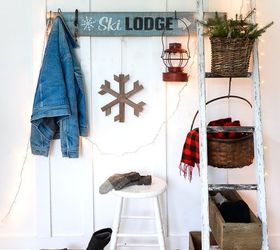
Paint source / Fusion Mineral Paint's Lamp White, Ash (dark grey) and Champness (blue).
Stencilling is actually VERY easy! With a few simple tips, your results WILL look pro!
1. Line up the centre of your stencil with the centre of your boards.
2. Tape into place so the stencils stay put.
Tip: Tap the back of the hand with your loaded brush. If the paint barely leaves a trace, you are ready!
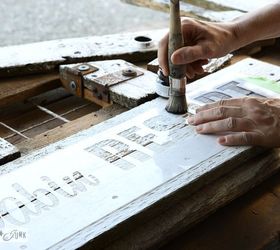
Tip: Create a 2 toned effect by adding darker toned paint to the bottom of the letters and lighter toned on top. Blend them both together towards the middle.
* To find the finished sign above, click my profile, then posts in Hometalk.
Original article and pictures take http://www.hometalk.com/11321743/when-christmas-signs-do-christmas-stuff-thanks-to-an-old-fence site
Комментариев нет:
Отправить комментарий