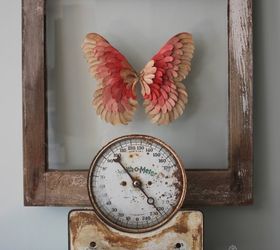
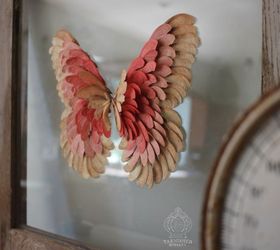
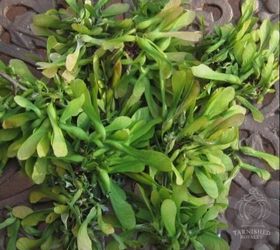
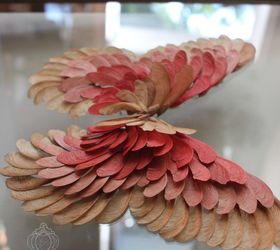
I had been planning on making some art work using a bunch of helicopters (a.k.a. maple seeds) I had gathered and I knew a butterfly would be the perfect subject.
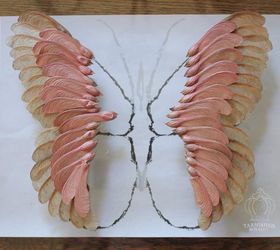
I picked up an old window at the flea market for $10. I decided on a coral color scheme and created an ombre effect by mixing the paint myself.
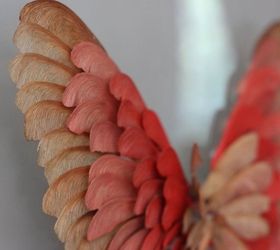
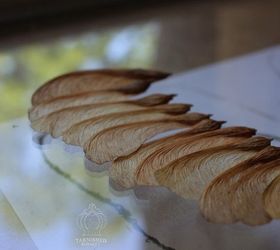
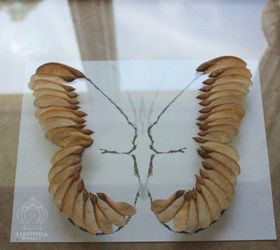
I love the way the helicopters look in their natural dried state, so I chose to leave them that way for the outer and inner borders of the butterfly.
Now for the how to's. To create your own maple seed butterfly art you'll need: 1) Maple Seeds (a.k.a. helicopters) 2) Old Window or Framed Glass 3) Craft Paints 4) Glue (I used E-6000)
Spring and fall are the best times to gather maple seeds. After you collect them you'll want to allow them to dry out. You can accelerate the drying process by laying them out in a single layer in a window sill. After a few days they will fade to the desired color.
Decide on a color scheme and buy or mix your paint. If an ombre effect is desired you can start with the darkest paint as your base and then mix in white or cream to lighten the formula each time you paint a new layer.
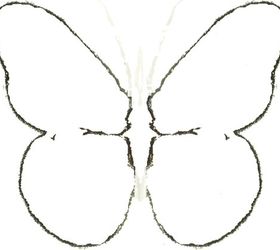
Draw or print out an outline of a butterfly sized to fit the frame you are using.
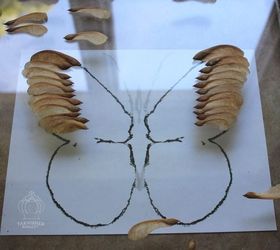
Place the drawing beneath the glass, centered within your frame. Begin gluing the helicopters around the outer edge, following the general shape of the outline as shown.
Once you have finished the outline you are ready to start on the second layer.
Glue the second layer, overlapping the first layer and covering the seed pod.
Continue gluing each consecutive layer in the same manner until your butterfly is complete.
Thank you so much for stopping in! Happy creating!
Original article and pictures take http://www.hometalk.com/11296524/maple-seed-butterfly-art site


Комментариев нет:
Отправить комментарий